For our next-to-last lab period, we decanted our finished brew into a keg and two dozen bottles. We also got experience capping the bottles and sampling some aged beer from previous classes.
The Final Steps of the Brewing Process
The first step in transferring our brew (Fig. 1) to other containers was to sterilize all of our equipment.
Equipment for this lab included a 5-gallon keg (Video 1), 12 used beer bottles, 12 bottle caps, a capping device (Fig. 2), several lengths of tubing (Fig. 3), and a small Carbon Dioxide tank (Fig. 2).
 |
| Fig. 1 Our wort looking very tasty before being decanted. |
 |
| Fig. 2 Carbon dioxide tank and other equipment for transferring the brew to the keg. |
 |
| Fig. 3 Equipment to be used for transfer of the brew to bottles and the keg. |
Video 1
Chris sterilizing the keg very enthusiastically.
Everything was sterilized with Stardust and tap water and then laid on (unsterile) paper towels (Figs. 4-6).
 |
| Fig. 4 Lauren sterilizing the tubing, buckets, bottles, and caps. |
 |
| Fig. 5 Sterilized bottles and other equipment |
 |
| Fig. 6 Sterilized tubing |
 |
| Fig. 7 Chris setting the sterilized keg inside of a bin |
 |
| Fig. 8 The tubing used to transfer brew from the keg to the bottles. |
 |
| Fig. 9 Tubing used to transfer Carbon Dioxide to from the CO2 tank to the keg. |
 |
| Fig. 10 Dr. Shaw attaching the tubing to the CO2 cylinder. |
 |
| Fig. 11 Running a sterilizing agent through the tubing. |
 |
| Fig. 12 Transferring the sterilization agent to a clean bucket |
 |
| Fig. 13 CarbTabs priming sugar. Four of these tabs were placed in each bottle prior to the transfer of the brew. |
 |
| Fig. 14 Capping the bottles after transfer of the brew. |
 |
| Fig. 15 Checking the density of the brew. |
 |
| Fig. 16 The face of disapproval. |
 |
| Fig. 17 Deception! |
 |
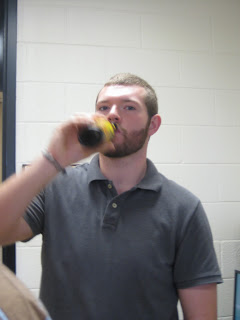
| Fig. 18 Chris trying some 2 year old beer. |
 |
| Fig. 19 Well, he doesn't hate it.... |
 |
| Fig. 20 Dr. Shaw priming the keg for a 1 week storage. |
Conclusion
Brewing beer was not as difficult as I thought it would be, but I'm pretty sure that I would not try it at home! The process is a lot longer than I anticipated, though. Hopefully it will be worth it!
All for now,
C
No comments:
Post a Comment